The intention of this post is to provide transparency to my sourdough process. This is what works for me with my starter and in my environment.
Table of Contents
Sourdough Starter
If you’re looking to build and maintain a sourdough starter, you’re in luck! I’ve had success with various methods, but my all-time favorite is the Serious Eats Sourdough Starter Recipe. One of the things I love most about this recipe is that it only requires a small amount of starter – just 5g! This means I can easily keep my starter on my kitchen counter without generating unnecessary waste. While some recommend maintaining a starter between 200-250g for optimal microbial health, I’ve personally found no issues with using a smaller amount. Keep reading to learn more about this easy and eco-friendly sourdough starter recipe!
Building my starter
Flour: half rye, half unbleached bread flour
Rye flour is nutrient and enzyme dense which aids in wild yeast cultivation.
- Day 1 (8:30am) Combine 10g of the flour mix and 10g water (1:1 ratio). Loosely cover and let ferment for 48 hours.
- Day 3 (8:30am) Combine 10g of starter with 10g flour mix and 10g water (1:1:1 ratio). Loosely cover and let ferment for 24 hours.
- Day 4 (8:30am) Combine 10g of starter with 10g flour mix and 10g water (1:1:1 ratio). Loosely cover and let ferment for 12 hours.
- Day 4 (8:30pm) Repeat step 3 feeding at a ratio of 1:1:1. Let ferment for 12 hours.
- Day 5 -7: Repeat feeding every 12 hours (Step 3 & 4) at a feeding ratio of 1:1:1
- Day 8 – Day 13: Combine 8g of starter with 16g flour mix and 16g water (1:2:2 ratio). Feed every 12 hours at this ratio.
- Day 14+: At this point, the starter should have matured and is ready to use. Use the starter at its peak– roughly 8-12 hours after feeding. Double-check that the starter is ready to use by performing a float test by dropping a small amount of starter in water. If it floats, it is ready to use.
Maintaining my starter
On weeks when I am consistently making bread, I keep my starter conveniently on the kitchen counter and feed it twice a day at 8:30 with a feeding ratio of 1:3:3 (sourdough starter to unbleached organic flour to water). In the winter months when it is cooler, I only feed once a day. I only keep/feed 5g of starter at any given time, the remainder (sourdough discard) goes into a mason jar and is stored in the fridge until enough is collected to make sourdough discard recipes.
Example feeding ratio: 1:3:3
5g starter, 15g flour, 15g water
During the times when I’m not actively baking with my sourdough, I transfer my starter to the fridge about 4 hours after feeding. I let it hibernate for approximately 4 days before taking it out, allowing it to come to room temperature, and repeating the feed and hibernation process. When I’m ready to use it again, I wait until my second feeding to build my levain, ensuring that my starter is happy and active.
Example: remove the starter from the fridge and let it come to room temperature, ~2 hours. Feed at the ratio of 1:3:3. After 12 hours, I would create my levain by feeding at 1:6:6 (see Sourdough Bread Process for more information) which will be used to make my sourdough loaf.
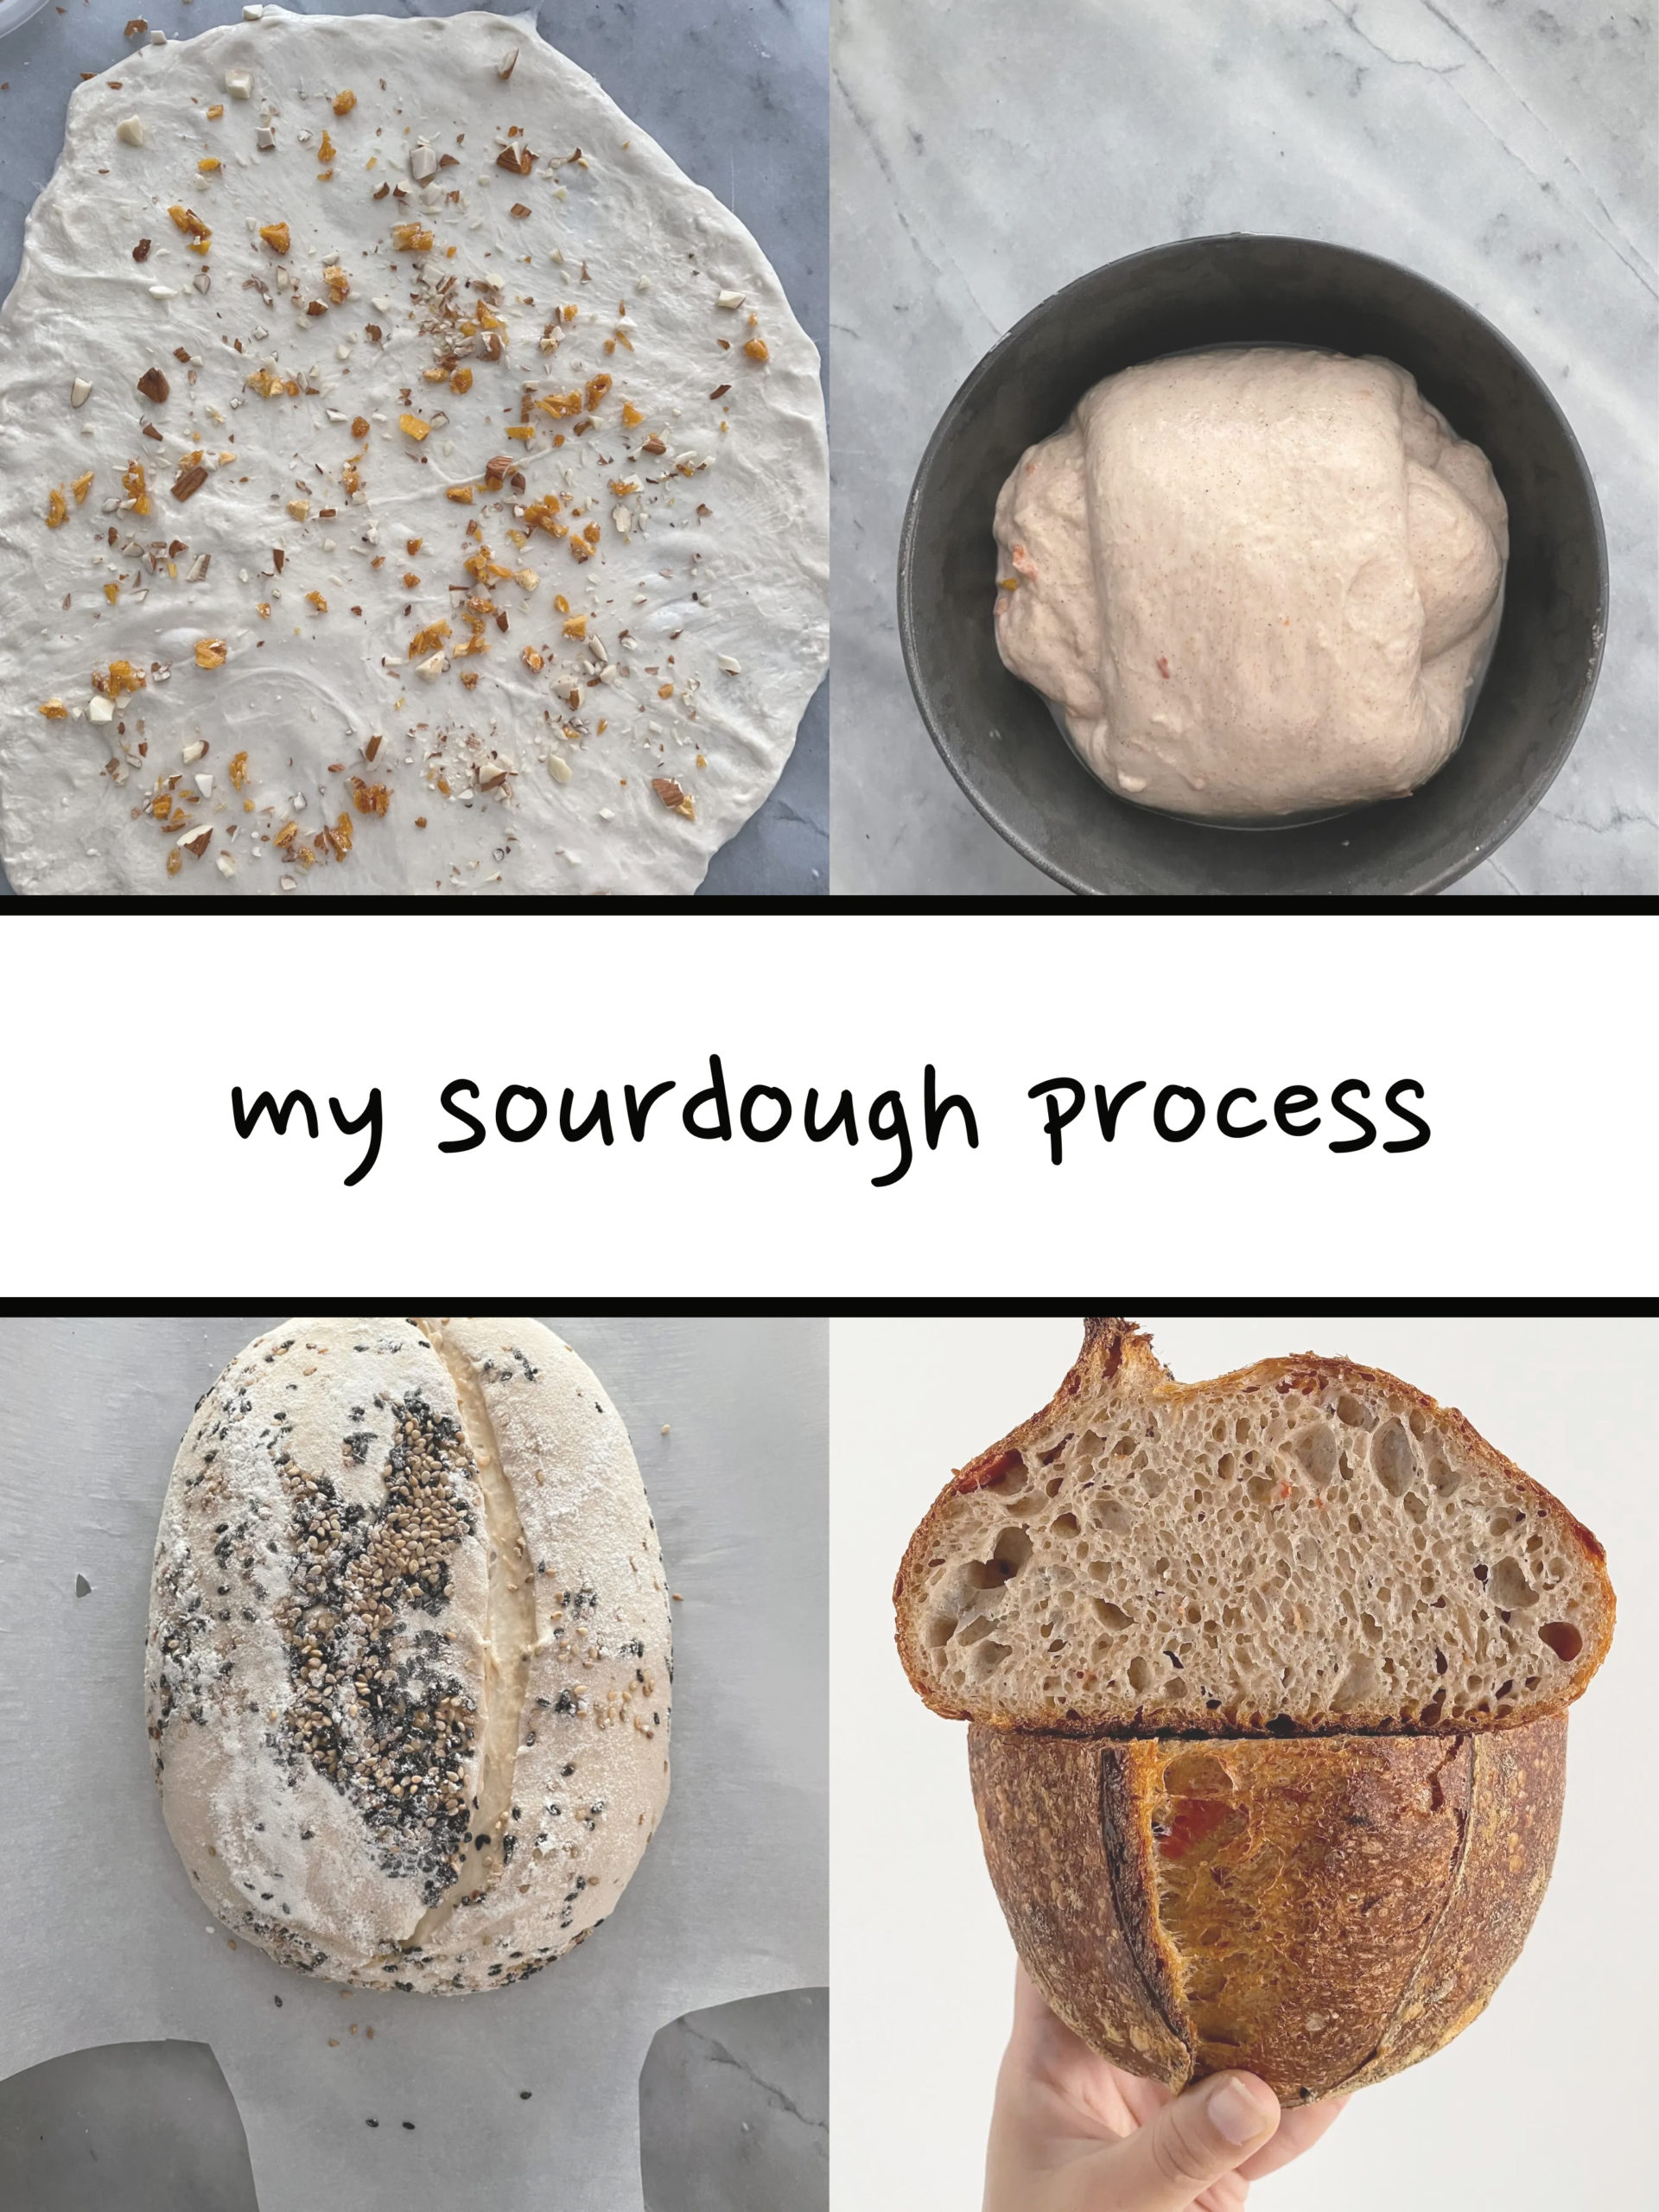
Sourdough Bread Process
My sourdough bread-making process has evolved over time but I started making sourdough bread by following the Tartine Country Bread method. I still use the same baker’s percentage for the bread ingredients but have incorporated other techniques to better fit my schedule and preferences.
Levain Build (1:6:6)
My levain build is made using a 1:6:6 ratio of sourdough starter to water and flour. This is made 8-10 hours before making the main dough.
| Ingredient | Ratio | Ex. Grams |
| Starter | 1 | 5g |
| Water | 6 | 30g |
| Flour | 6 | 30g |
Main Dough
My dough ingredients use the same Baker’s Percentage as the Tartine Country Loaf. The hydration level fluctuates depending on the type of flour and inclusions being used. My favorite hydration level in a typical white loaf is 80%.
| Ingredient | Baker’s % | Ex. Grams |
| Flour | 100% | 300g |
| Levain | 20% | 60g |
| Water | 75% – 88% | 225g – 258g |
| Salt | 2% | 6g |
Schedule
I live in the San Francisco Bay Area and the temperature here is pretty mild and dry year-round. As a result, my baking schedule is very consistent. I start bulk fermentation in the morning when the average temperature is around 72F ending in the early afternoon when the temperature is about 75F. I follow that with some floor time, about 45min-1hr before retarding my dough in the fridge overnight. The total bulk fermentation averages around 6-6.5hrs and the cold retard is about 16-19hrs. The following morning is bake day. I start by preheating my dutch oven in the oven at 500F for about 30-45min. The dough is then taken out of the fridge, scored and placed immediately into the heated dutch oven. It is baked covered at 450 for at least 20 minutes and then uncovered at 450 until it is done. The typical size of my loaf is about 300g so the total bake time is about 40 minutes.
Here is a rundown of what a typical baking schedule looks like for me.
Day 1: Build Levain
9:30pm: Make levain and any porridge I want to add.
Day 2: Ferment Dough
- 7:30am: Autolayse – mix flour and water together, reserving 10g of water. Set aside. Mix the reserved 10g of water with salt. set aside.
- 8:30am: Start Bulk Fermentation – add levain into flour and water. Squeeze and fold to incorporate.
- 9:00am: Add salt water mixture into the dough. Squeeze and fold to incorporate.
- 9:30am: Stretch & Fold – Take the side of the dough and stretch it up and over the top of the dough. Rotate and repeat. Do about 4-6 stretch & folds or until the dough is tight.
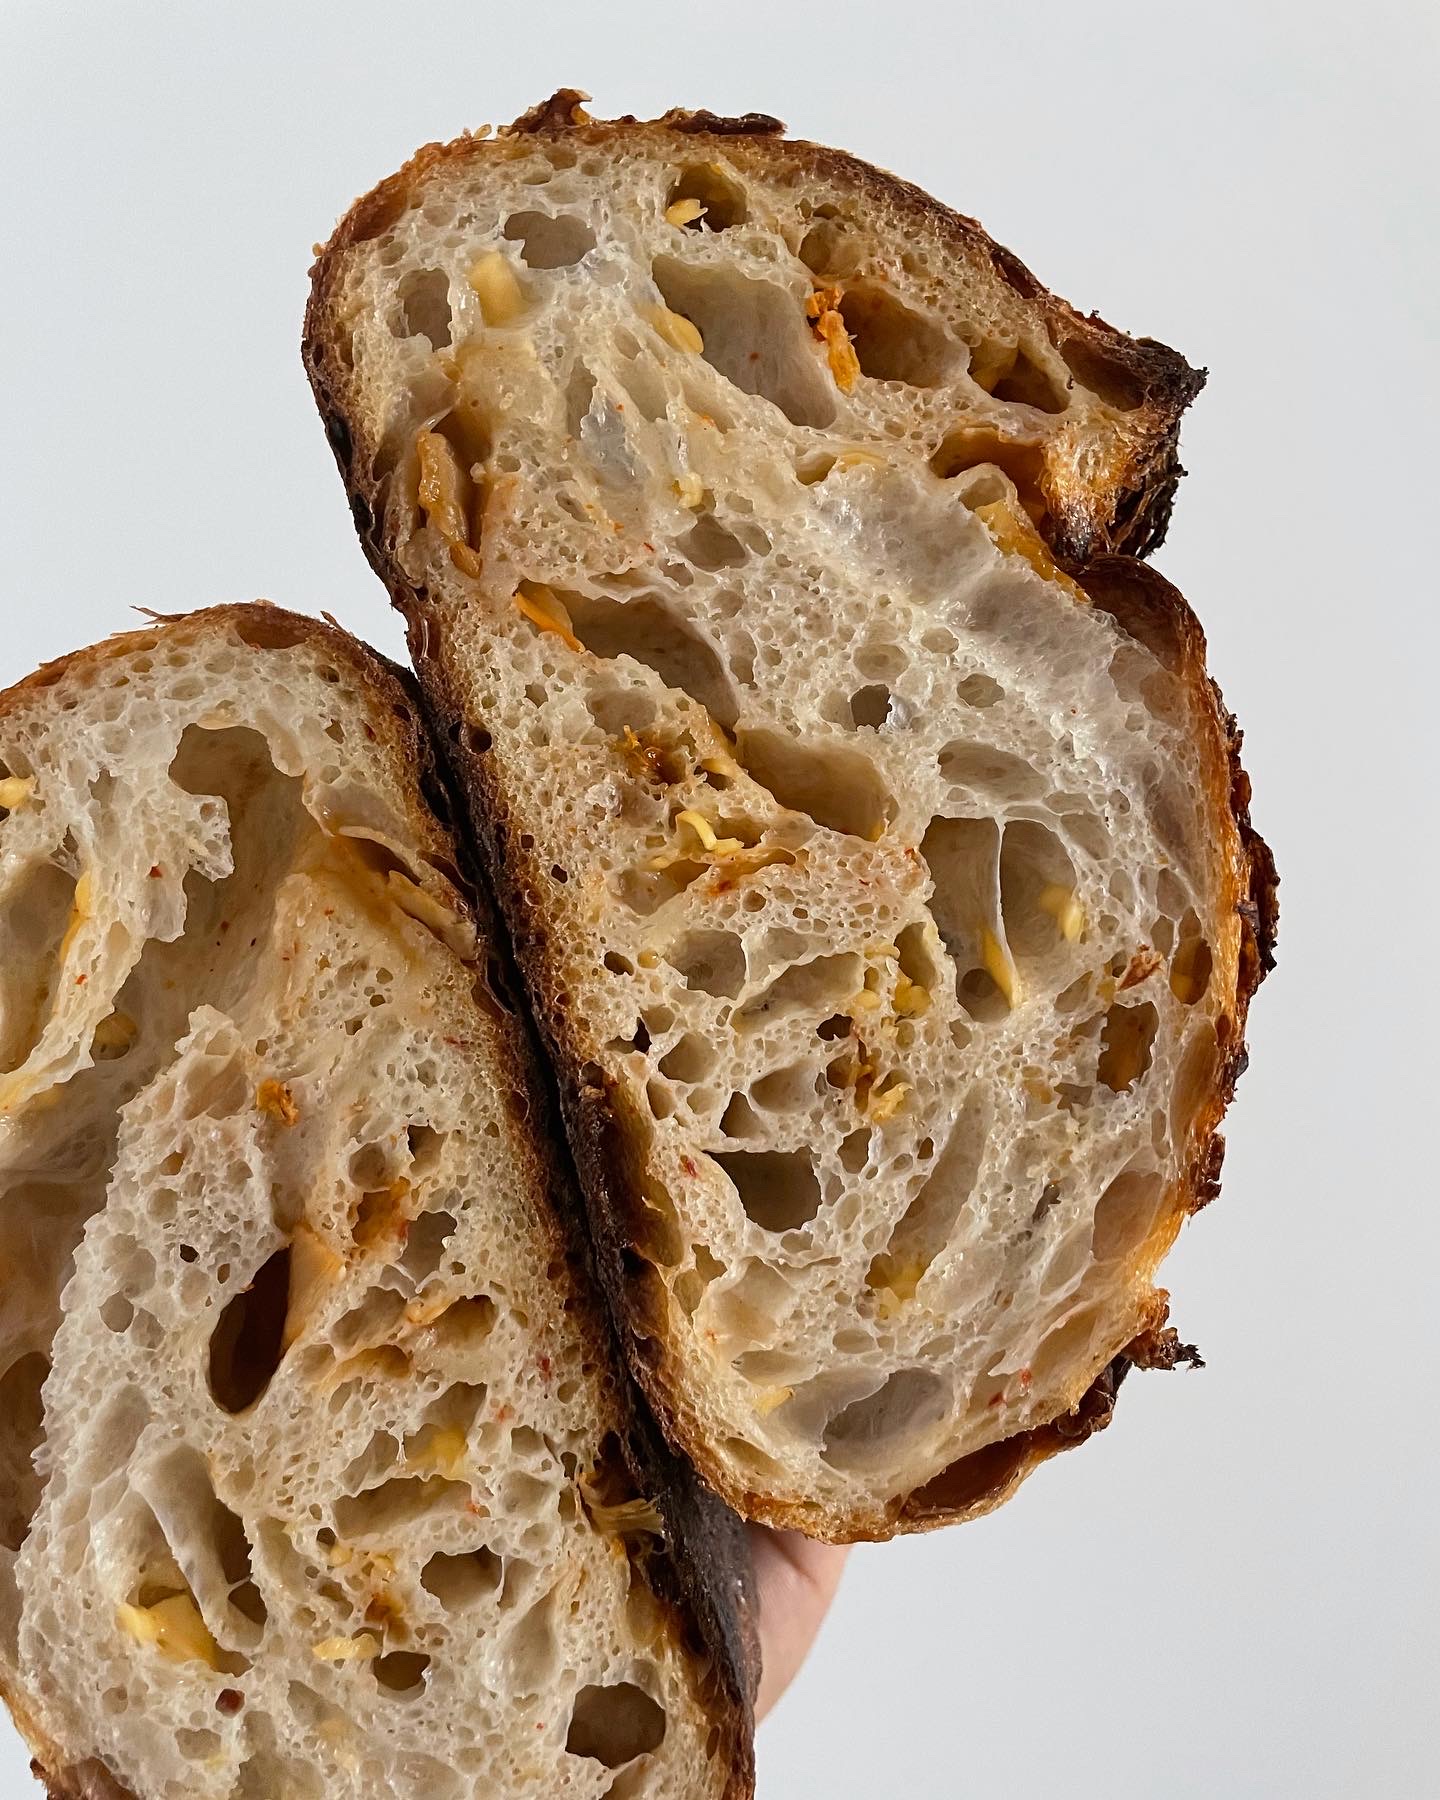
- 10:00am: Laminate – Wet a work surface with a thin layer of water. Transfer the dough onto the surface and spread it thin. At this point you can add your inclusions (ex. nuts, dried fruit etc). After sprinkling on the inclusions, fold one side of the dough over 2/3 of the dough, like a letter, and then fold the other side of the dough over, completing the letter fold. Sprinkle more inclusions on top of the exposed side and then roll the dough up, completing the lamination process. The laminated dough is then placed in the proofing container seam side down.
- 10:30am: Coil Fold – The dough at this point should look relaxed. Lift the dough from the center, stretching out one of its sides until it comes free from the container. Allow the free edge of the dough to fold under. Release the dough. Repeat on the other end: Lift the dough again from the center, freeing the other end. Allow it to fold under. Release the dough. Rotate the proofing container and repeat 1-3 on the other side. If you are unsure what side you are working on, take a look at the ends, they should look coiled– we want to fold these ends under. See a video of this folding here.
- 11:00am: Coil Fold – The dough should be relaxed again so repeat the coil fold.
- 11:45am: Coil Fold – The dough should be relaxed again so repeat the coil fold.
- 12:45pm: Coil Fold – The dough should be relaxed again so repeat the coil fold. This is the last coil fold.
- 1:45pm: Shape – lightly dust a banneton or proofing towel with 1:1 flour and rice flour. The rice flour helps prevent sticking. Now dust your work surface and the top of the dough with flour. Turn the proofing container upside down onto the work surface. The dough should come free. Take the left side of the dough between your fingers and stretch it out and then over the center, like a letter fold. Lightly press the sides into the center. Repeat with the right side, completing the letter fold. The dough should look like a thick rounded log. Now take the top of the dough and fold it over the center, lightly pressing the edges down. Roll the rest of the dough over, swiss roll style until the seam is at the bottom. Pinch the edges closed and tuck them under the dough. Using a bench scraper, flip the dough from the work surface into your hands, seam side up and place it in the banneton. Cover and let the dough rest for 1 hour.
- 3:00pm: End Bulk Fermentation: ~6.5 hours. Put the dough into the fridge to retard (cold ferment) ~16-19 hours.


Day 3: Bake
- 9:00am: Preheat the oven to 500F. Place the dutch oven inside.
- 9:40am: Take a parchment paper and cut the corners out. This helps with putting the sourdough into the dutch oven. Flip your dough out from the proofing basket. Score and lightly spray with water from a spray bottle. Take the dutch oven out of the oven and remove the lid. List the dough by the ends of the parchment paper and place it inside the dutch oven. Put the lid back on and transfer the dutch oven to the oven. Reduce the oven temperature to 450F.
- 10:00am: Take the dutch oven out and remove the lid. Marvel at your work and transfer it back to the oven.
- 10:30am: Finish Bake. Remove the sourdough and let it cool for about an hour before slicing.


Sourdough essential tools
Below is a list of tools that I use to make a basic sourdough bread
- kitchen scale
- large mixing bowl with a lid: used to mix ingredients and fold the dough
- plastic bench scraper: used to handle dough
- metal mesh tea strainer: use to dust flour on my working surface and on the dough
- proofing linen or towel: to line the banneton to prevent the dough from sticking
- oval banneton: for proofing the dough after shaping
- plastic disposable shower cap: used to cover the banneton when the dough goes into the fridge for a cold retard
- parchment paper
- lame: for scoring
- dutch oven: for baking
- large bread knife: for slicing
Misc
flour dusting mix: 1:1 all purpose flour and rice flour. The rice flour helps prevent the dough from sticking.